Tuesday 30 December 2008

HSQL Database Manager Tool

Just as a quick aside at this point, start up the JMX console application and click on
the service=Hypersonic link which you’ll find under the section jboss. If you can’t
find this, make sure the Hypersonic service is enabled in the hsqldb-ds.xml file.
This will take you to the information for the Hypersonic service MBean.
Scroll down to the bottom of the page and click the invoke button for the
startDatabaseManager() operation. This starts up the HSQL Manager, a Java GUI
application which you can use to manipulate the database directly.

please see HSQL Manager for download and the code for addtional information

Before Running HSQL Manager , ensure your XAMPP/LAMPP already running
How To Install XAMPP/LAMPP see in here

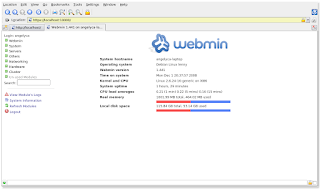
1. The Result Unzip as below


type S$ sudo ./run_hsqlmanager.sh
for running HSQL Manager

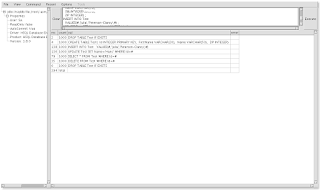
2. Display HSQL Manager as below


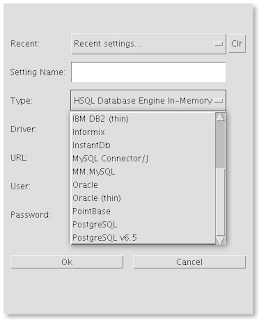
3. HSQL Database Can Connect many Database type as below


I will continue in future, how to used it

Monday 29 December 2008

ManDVD Creating Video

if you not install , please install 1st ManDVD as Here the Link

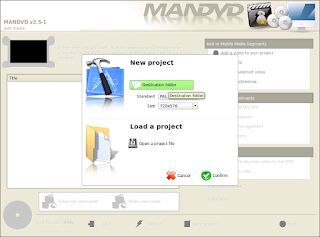
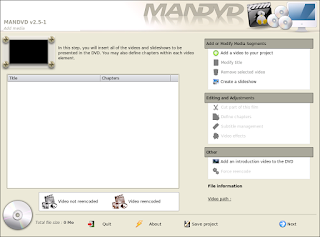
1. Start " ManDVD"


2. Arrange " Destination Folder "


3. Add Video or Photo for Slide Show and then click ' Next ' If Ready


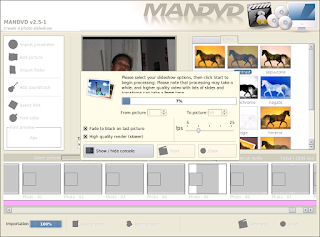
4. If Choose Slide Show For Picture the Display as below


Add Picture ; Additional Picture
Import Folder ; Take All Picture in a Folder
Also you can Edit " Effect , Transition etc " to make nice slide show

try it :-) folks

Burn in using Brasero Disk Burning

How To Burn in Data/Image/Video in Linux as below;
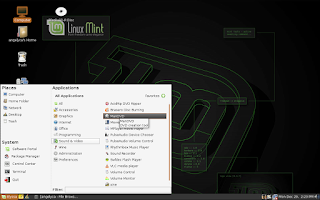
1. Click --> Brasero Disc Burning


2. Choose What we Want to Burn in


3. Choose Which Folder or Files We Want to Burn in


4. All Files or Folder Which We Want To Burn in
Click " ADD " if Want To Add Files or Folder to Burn in
Click " BURN " if Want to Start Burn Process


5. Information Disc and Setting Burn In
Label : Name Of CD/DVD After Burn In
Click " BURN " to Process Burn in If Setting Already OK


6. Process Burn in


please try it :-)

Monday 22 December 2008

ndiswrapper (Installation of Windows WIFI Driver)

If We want to Install Drive Wi_Fi in Mint , Ubuntu or BlankOn without Update Kernel
We Can Try using ndiswrapper

please update using Synaptic Package Manager
and Search " ndisgtk "


please continue in here

Album Photo using GTKRawGallery

We Arrange Our Photo memories using GTKRawGallery
1. Download GTKRawGallery http://gtkrawgallery.sourceforge.net/


2. Result unzip file as below


3. Click GTKRawGallery.py and See the result


enjoy it ;-)

Wednesday 10 December 2008

Change login banner for Gnome (GDM) Desktop

Sometimes we want to make different Display Login Menu
Here We can Make It

Before start, please Download Gnome Login menu File in Internet


1. Go to " Login Menu "


2. tab go to "LOCAL" ---> Click " ADD "


3. Choose GDM File


4. Go to Local , See Result after Install and Choose Wanna to Display Login Menu

please Restart To See Final Result
enjoy it :-)

Create JAD for Jar in Linux (01)

Here is Code of Created JAD in Linux
Jad file we need to running Jar File in Java
With JAD and JAR , in our PC can running File such as Games Java in HandPhone Nokia, SE (Sony Erickson) etc


Save this as “jadmaker.sh”:


#!/bin/bash
#
# Given a J2ME midlet jarball, create a JAD for it
# Usage: ./jadmaker.sh

# safety check 1
FILE=$1
if [ ! -f "${FILE}" ]; then
echo "Input file '${FILE}' missing, exiting."
exit 1
fi

# safety check 2
JAD="${FILE%.*}.jad"
if [ -f "${JAD}" ]; then
echo "${JAD} already exists, overwrite? (y/N)"
read tmpans
answer=$(echo "$tmpans" | tr '[:upper:]' '[:lower:]')
if [ "$answer" != "y" ] && [ "$answer" != "yes" ]; then
echo "Not overwriting ${JAD}, exiting."
exit 1
else
rm -f "${JAD}"
fi
fi

# unzip the internal manifest, changing line endings to our local OS
# the sed action removes blank lines, with or without spaces/tabs
unzip -aa -j -p ${FILE} "META-INF/MANIFEST.MF" | sed -e '/^[ \t]*$/d' > "${JAD}"

# generic variables
echo "MIDlet-Jar-URL: ${FILE}" >> "${JAD}"
echo "MIDlet-Info-URL: http://" >> "${JAD}"

# actual jarball size
FILESIZE=$(stat -c%s "${FILE}")
echo "MIDlet-Jar-Size: ${FILESIZE}" >> "${JAD}"

# weee
echo "Created ${JAD}."
exit 0


==========================================================
Reference
http://java.sun.com

Tuesday 9 December 2008

NETSTAT in Linux

NETSTAT (network statistics) is useful for tracking down network problems. Use NETSTAT to
troubleshoot incoming or outgoing packet errors or to verify the presence of needed routes.
If you type netstat at the MS-DOS prompt, you see the protocol used, the name and local
address of the computer, and any connected computers and their current state

Netstat –a Displays all connections and listening ports
Netstat –e Displays Ethernet statistics
Netstat -n Displays addresses and numbers in numerical format
Netstat -s Displays the statistics of TCP/IP protocols: TCP, UDP, and IP

usage: netstat [-anv] [-f address_family]
netstat [-g | -p | -s] [-n] [-f address_family] [-P protocol]
netstat -m
netstat -i [-I interface] [-an] [-f address_family] [interval]
netstat -r [-anv] [-f address_family]
netstat -M [-ns] [-f address_family]
netstat -D [-I interface] [-f address_family]

Wednesday 3 December 2008

XAMPP / LAMPP for Linux

Finally I Can Get My Projects Web Running in Linux
The Tools Need to Do
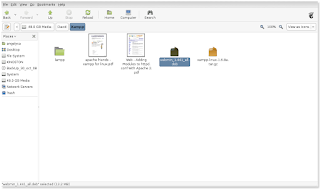
1. Download Xampp for Linux in http://www.apachefriends.org
such file as "xampp-linux-1.6.4.tar.gz"

2. Extract the downloaded archive file to /opt:

sudo tar xvfz xampp-linux-1.6.8a.tar.gz -C /opt

Warning: Please use only this command to install XAMPP. DON'T use any Microsoft Windows tools to extract the archive, it won't work.

Warning 2: already installed XAMPP versions get overwritten by this command

3. Start Lampp/XAMPP
/opt/lampp/lampp start

You should now see something like this on your screen:

Starting XAMPP 1.6.8a...
LAMPP: Starting Apache...
LAMPP: Starting MySQL...
LAMPP started.

Ready. Apache and MySQL are running.


4. http://localhost


5. Mysql Area --> http://localhost/phpmyadmin


6. Now try put File Projects as oscommerce in /opt/lampp/htpdocs


Here a list of missing security in XAMPP:

1. The MySQL administrator (root) has no password.
2. The MySQL daemon is accessible via network.
3. ProFTPD uses the password "lampp" for user "nobody".
4. PhpMyAdmin is accessible via network.
5. Examples are accessible via network.
6. MySQL and Apache running under the same user (nobody).

To fix most of the security weaknesses simply call the following command:

/opt/lampp/lampp security


Parameter Description
start Starts XAMPP.
stop Stops XAMPP.
restart Stops and starts XAMPP.
startapache Starts only the Apache.
startssl Starts the Apache SSL support. This command activates the SSL support permanently, e.g. if you restarts XAMPP in the future SSL will stay activated.
startmysql Starts only the MySQL database.
startftp Starts the ProFTPD server. Via FTP you can upload files for your web server (user "nobody", password "lampp"). This command activates the ProFTPD permanently, e.g. if you restarts XAMPP in the future FTP will stay activated.
stopapache Stops the Apache.
stopssl Stops the Apache SSL support. This command deactivates the SSL support permanently, e.g. if you restarts XAMPP in the future SSL will stay deactivated.
stopmysql Stops the MySQL database.
stopftp Stops the ProFTPD server. This command deactivates the ProFTPD permanently, e.g. if you restarts XAMPP in the future FTP will stay deactivated.
security Starts a small security check programm.

Good Luck :-)
Now I Can Focus Total Web in Linux
Monday 1 December 2008

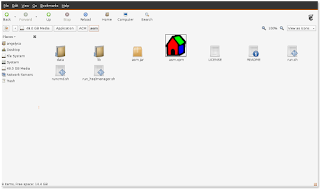
How To Install Webmin in Linux Ubuntu/Mint

Step by Step Install Webmin
------------------------------
1. provide file "webmin_1.441_all.deb" in http://www.webmin.com/deb.html


If you are using the DEB version of webmin, first download the file and then run the command :
dpkg --install webmin_1.441_all.deb

If Debian complains about missing dependencies, you can install them with the command :
apt-get install perl libnet-ssleay-perl openssl libauthen-pam-perl libpam-runtime libio-pty-perl libmd5-perl

If you like to install and update Webmin via APT, edit the /etc/apt/sources.list file on your system and add the line : deb http://download.webmin.com/download/repository sarge contrib You should also fetch and install my GPG key with which the repository is signed, with the commands : cd /root
wget http://www.webmin.com/jcameron-key.asc
apt-key add jcameron-key.asc You will now be able to install with the commands : apt-get update
apt-get install webmin

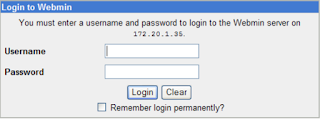
2. http://localhost:10000/

The install will be done automatically to /usr/share/webmin, the administration username set to root and the password to your current root password. You should now be able to login to Webmin at the URL http://localhost:10000/ .


3. Now You Arrange Your Web Server such as E-mail, FTP, Sharing , Apache , etc


enjoy it :-)